
How to start an Airbnb is the question every new host types before their first booking, and the good news is the setup is simpler than it looks. This guide walks you through launching your first listing step by step, then shows how a little automation from day one keeps the work from eating your evenings. We will cover the listing process, pricing, your first guests, and the exact moments where new hosts burn out so you can avoid them. By the end you will know how to start an Airbnb and run it without living in your inbox.
How to start an Airbnb in 2026: the short version
To start an Airbnb, create a free listing in three steps: tell Airbnb about your space, add photos and a description, then set your price and publish. After that, set up self check-in, turn on a cleaning routine, and automate guest messaging so you reply fast without being glued to your phone.
That is the whole arc. The rest of this guide expands each step and adds the part most beginner tutorials skip: how to stop the busywork before it starts. Most of these first time Airbnb host tips cost nothing and take an afternoon.
In plain English: what hosting actually is
In plain English: you are renting a clean, well-described room or home to travelers, and Airbnb is the storefront that handles search, booking, and payment. You set the price and rules. Airbnb takes a small cut, sends you the guest, and pays you after check-in. Your job is to make the stay smooth and the listing honest.
Step 1: Decide what you are listing and check the rules
Before you write a word, decide what space you are offering: a private room, a whole apartment, or a standalone unit. Each one attracts a different guest and a different price. A private room is the cheapest way to test Airbnb for beginners because you already own everything you need.
Then check your local rules. Many cities require a short-term rental permit, a registration number, or set a cap on nights per year. Your lease or HOA may restrict subletting. This is the single most expensive step to skip, so confirm it before you spend on furniture or photos.
- Private room: lowest startup cost, you share common areas, easiest first test
- Entire place: higher nightly rate, more demand, needs full furnishing and a cleaning plan
- Separate unit: best margins, but usually the strictest local permit rules
Step 2: Create your listing (the three core steps)
Creating the listing itself is free, and Airbnb collects a service fee only once you get paid. The official flow breaks into three core steps that you can pause and resume anytime.
- Tell Airbnb about your space: property type, location, number of bedrooms and bathrooms, and how many guests you can host
- Make your listing stand out: upload high-quality photos, write a clear title and description, and select the amenities you offer
- Set your pricing and publish: choose weekday and weekend prices and decide whether to add a new-listing promotion
Airbnb lets you publish a basic listing fast and refine it later, so do not wait for perfection. You can update the calendar, cancellation policy, and house rules after you go live.
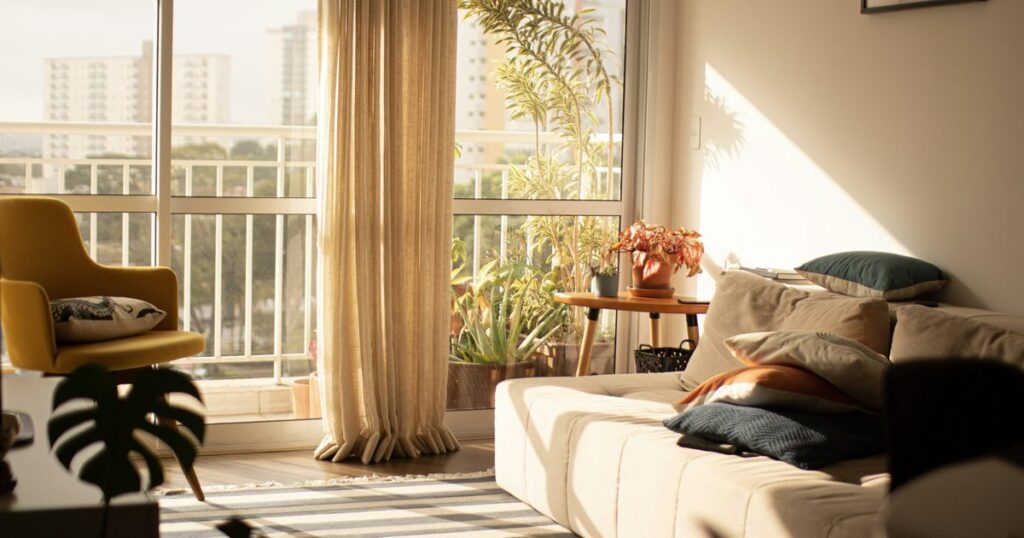
Photos and title: where beginners win or lose
Your first photo is your entire first impression in search results. Use natural light, shoot every room, and lead with your strongest angle. Airbnb highlights amenities guests filter for most, so feature wifi, self check-in, a workspace, free parking, and pet-friendly if you offer them.
Write a title that names the benefit, not just the place: “Quiet studio, 5 min to downtown, fast wifi” beats “Nice apartment.” Honest descriptions also cut the messages you get later asking what you forgot to mention.
How much does it cost to start an Airbnb?
Creating a listing is free. Your real startup cost is getting the space guest-ready, plus the Airbnb host service fee, which for most individual hosts is about 3% of the reservation subtotal, deducted automatically before you are paid. You do not need a property manager or PMS software to begin.
Here is a realistic beginner budget for a private room or small unit. Treat these as starting ranges, not fixed prices.
- Linens, towels, basics: ~$150 to $400
- Safety items (smoke and CO detectors, first-aid, lockbox): ~$80 to $200
- Smart lock for self check-in: ~$100 to $250 (optional but recommended)
- Better photos: ~$0 if you shoot well yourself, or a one-time cost for a pro
- Airbnb host service fee: ~3% of each reservation subtotal, taken from your payout
So the upfront spend is often a few hundred dollars, and the ongoing platform cost is that small percentage per booking. Note: a higher single fee around 15.5% applies only to hosts who run their prices through property management or channel-management software, which is not the path a beginner needs.
Step 3: Price it, set house rules, and turn on self check-in
Set a launch price slightly below comparable listings so you can collect your first reviews fast, then raise it. Airbnb offers a new-listing promotion for exactly this reason. Write clear house rules covering quiet hours, guests, pets, and smoking so expectations are set before anyone books.
Self check-in is the biggest quality-of-life upgrade for a new host. A lockbox or smart lock means you never have to be home at a specific hour, and it removes the most common late-night problem: a guest stuck outside. This is also the first place automation pays off.
Step 4: Automate from day one so you do not burn out
Here is the part beginner guides miss. The listing is easy; the grind is everything after a guest books, the same questions, the same check-in details, the same review reminders, every single stay. Doing this by hand is fine for one booking and miserable by your tenth.
This is where BnBGenius fits. It is built for individual hosts with 1 to 5 listings and follows the idea of “everything a PMS does, without the PMS.” It installs as a Chrome extension in about two minutes and reads your Airbnb dashboard directly, with no API keys and no login sharing.
BnBGenius is free for your first 500 messages with all features unlocked, then a flat $10 per month for unlimited messages, reviews, and upsells across any number of listings, with no contracts. For a new host that is the cheapest insurance against inbox burnout you can buy.
What to automate first
- Guest messaging: instant replies and check-in details with Airbnb automated messages so you keep a fast response time
- Reviews: AI-written reviews from real stay data, posted the day after checkout, via Review Automation
- Phone calls: an AI Voice Concierge that answers guest calls and escalates only when it truly needs you
- Tasks and cleaning: Task Loop turns guest messages into tasks and mobilizes your cleaner
Meet Maria: from inbox chaos to autopilot
Meet Maria. She runs ~3 listings in a mid-size city and started exactly where you are, replying to every message by hand. She spent ~2 hours a day on repetitive questions and check-in instructions, and twice she missed the review window because life got busy.
Before: response time slipping, ~2 hours/day lost, two missed reviews, and a creeping sense she needed to hire help she could not afford. After: she set up check-in and check-out message templates and let automation handle first replies and reviews. Her hands-on time dropped to ~20 minutes a day and her reviews now post automatically.
Why it wins: Maria did not buy an expensive PMS or hire a co-host. She kept the same $10/month tool and simply stopped doing the repetitive 80% by hand. That is the difference between a side hustle that drains you and one that runs itself.
An analogy: automation is your night-shift co-host
Think of guest messaging like a cleaning turnover. You could strip the beds, scrub, and restock yourself after every checkout, and at one listing maybe you do. But the moment you have steady bookings, you hire a cleaner so the turnover happens reliably without you.
Automation is the same move for your inbox and reviews. It is the co-host who works the night shift, answers the 11 p.m. “how do I get in?” message, and never forgets to post a review, so you are not splitting your income to get your evenings back.
Myth vs reality for new hosts
Myth: You need expensive property-management software or a manager before you can automate anything.
Reality: Automation is exactly what lets a solo host skip both. A Chrome extension that reads your dashboard handles messaging, reviews, and upsells for a flat $10/month, no PMS and no manager required.
Myth: Automated replies feel robotic and hurt your reviews.
Reality: Fast, accurate answers are what guests rate highly. Automation sends the right check-in details instantly and escalates the rare odd question to you, which protects your rating rather than risking it. You can learn more on the Airbnb automation overview.
Mistakes first-time Airbnb hosts make
These are the avoidable ones I see most often. Each costs either money, reviews, or your sanity.
- Skipping the permit check: launching before confirming local short-term rental rules can mean fines or a forced shutdown. Verify first, furnish second.
- Weak photos and a vague title: a dim hero photo buries you in search. This is the cheapest thing to fix and the highest-leverage.
- Answering everything by hand: it works for one booking and collapses at ten. Set up automated messages before you are busy, not after you are drowning.
- Forgetting to review guests: miss the 14-day window and the review is gone forever, which slows your climb to Superhost. Automate it.
- Leaving gap nights empty: a one-night hole between bookings often goes unsold. An Upsell Engine offers stay extensions and fills those nights automatically.
First time Airbnb host tips that pay off fast
Beyond the setup, a few habits separate hosts who climb quickly from those who stall. These first time Airbnb host tips compound with every stay.
- Reply fast, always: a quick response time builds trust and feeds your ranking. Automate first replies so speed is the default, not a scramble.
- Nail self check-in: clear, automated instructions cut your most common late-night messages to near zero.
- Ask happy guests to rebook: stay-extension and gap-night offers turn one stay into two without new marketing.
- Never miss a review: posting within the 14-day window protects your reputation and your Superhost progress.
How automation helps you reach Superhost
Superhost is the goal most beginners aim for, and the criteria reward exactly what automation delivers. Over a rolling 365 days you need a strong booking history, a high response rate, a low cancellation rate, and a top overall rating, checked by Airbnb every three months.
Automation directly supports two of those: a consistently fast response rate and never missing a review. If you want the full roadmap, read how to become an Airbnb Superhost in 2026 and the guide on maintaining a 100% response rate.
Airbnb for beginners: manual vs automated from day one
Should you start fully manual or automate early? For most Airbnb for beginners, automating the repetitive parts from day one is the better call, because the habits you set at one listing are the ones that scale. Here is the honest comparison.
| Factor | Manual hosting | Automated with BnBGenius |
|---|---|---|
| Setup time | None extra | ~2-minute Chrome extension install |
| Daily time on messages | ~1-2 hours | ~15-20 minutes |
| Missed reviews | Common when busy | Auto-posted day after checkout |
| Response speed | Depends on you | Instant first reply |
| Monthly cost | $0, but high time cost | Free for first 500 messages, then flat $10/month |
| Needs a PMS or manager | Eventually, as you grow | No, by design |
Verdict: start manual only if you want to feel the pain first. Otherwise, automate messaging and reviews on day one and put your energy into the listing and the guest experience.
Your day-one launch checklist
Pull it together and you have a clean launch plan. Work top to bottom and you can go live this week.
- Confirm local rules and any permit or registration you need
- Prep the space: clean, declutter, fresh linens, stocked basics, safety devices
- Shoot great photos and write a benefit-led title and honest description
- Set a launch price below comparable listings and add the new-listing promotion
- Write house rules and turn on self check-in with a lockbox or smart lock
- Install BnBGenius and turn on automated messaging plus review posting
- Publish, then refine your calendar and pricing as bookings come in
If you want deeper playbooks as you grow, the BnBGenius blog covers everything from running your Airbnb on autopilot to filling gap nights automatically.
Frequently asked questions
How much does it cost to start an Airbnb?
Creating a listing is free. Expect a few hundred dollars to get the space guest-ready, plus an Airbnb host service fee of about 3% of each reservation subtotal taken from your payout. Add a flat $10/month if you automate with BnBGenius after the free first 500 messages.
Do I need a PMS to manage my first Airbnb?
No. A property management system is built for large portfolios. As a solo host with 1 to 5 listings, you can handle everything with a Chrome extension that reads your dashboard, which is the whole point of BnBGenius at a flat $10/month.
How fast can I go live?
You can publish a basic listing the same day, since Airbnb lets you refine it after launch. A realistic, well-prepared launch with photos, rules, self check-in, and automation set up takes about a week.
Ready to host without the busywork? See BnBGenius pricing or read the official Airbnb guide on how to get started on Airbnb to begin.